The first thing customers do is monitor and filter the price, size, colours, categories and other item’s properties. So, in this tutorial, we will consider the main steps to set up the Attributes.
Each product you’re planning to sell should be listed as a WooCommerce product.
Firstly, navigate WooCommerce -> Products -> Add New product or edit already created one. After you created the product page, it’s time to set the attributes for this product.
Create the attributes
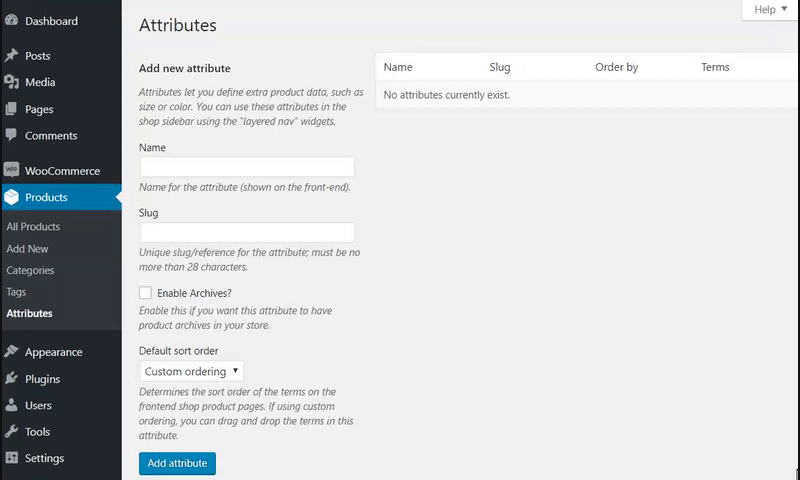
To create and set the attributes listed in WooCommerce, navigate to Products -> Attributes. Here you can add such properties as:
- Name. Add attribute’s name.
- Slug. A unique code for the attribute.
- Enable archive: check it if you want this attribute to have product archives in your store.
- The default sort order: defines sort order.
- After that just click Add attribute button.

When, on the right side, you will see your new attribute. Press Configure the terms to add info:
- Name: what will appear on the site
- Slug: a unique code
- Description: write more about the new attribute’s item
- Click “Add new” button.
Add the attributes to the product
To add the created attributes, to the product, open the product page and scroll down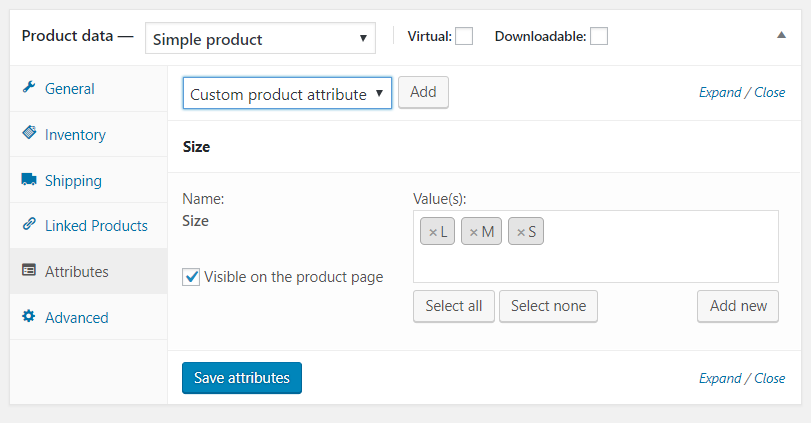
- Find the Product data section
- Click Attributes
- Search your attribute and add it.
- After that, select the item’s relevant characteristics from the drop-down list. Here you can add new attributes as well. Notice, that you can add more than one choice.
Here you can see a short video instruction step by step:
Attribute Filter Settings
Here you can:
- Edit Filter title and description
- Select attribute . Here you may select attribute to be displayed on your site from the list.

- Show title label. Here you can choose how to show the title with the function of opening / closing the filter:
- desktop (No; Yes, show as close; Yes show as opened)
- mobile (No; Yes, show as close; Yes show as opened)
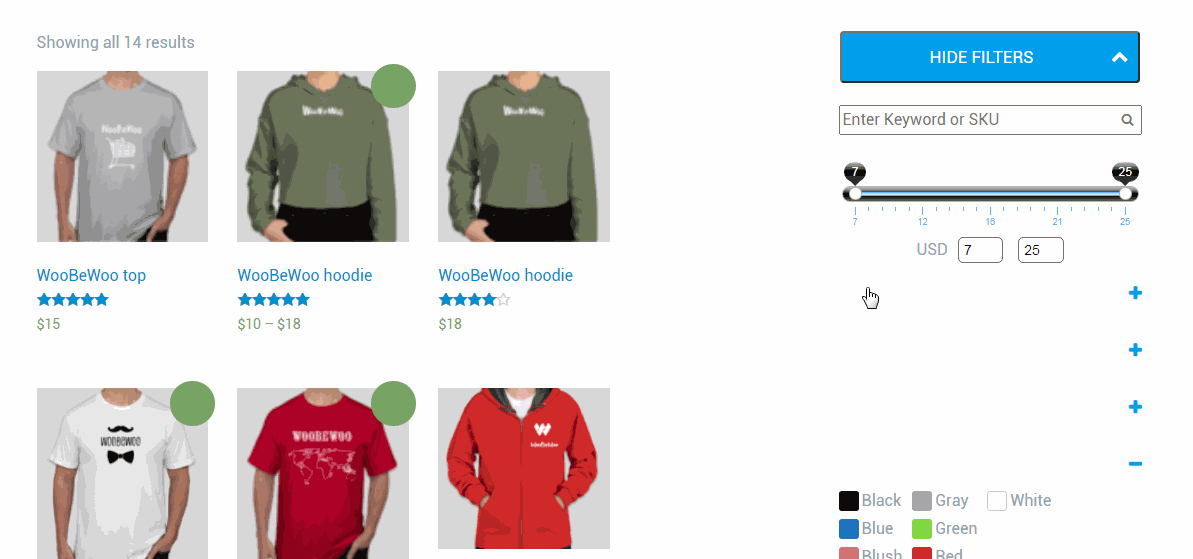
- Show on frontend as. Depending on whether you need one or several tags to be available at the same time, you may show your tags list as checkbox or dropdown.
- Checkbox list
- Dropdown
- Radio buttons list (single select)
- Multiple Dropdown. For this type, there is the Single select mode that allows only one item from the list to be selected at a time
- Colors
- Text
- Buttons . If you select the buttons, then you can fully customize their design.
- Switch
- Slider. Attention! Slider type works only with numeric titles of attributes

- Select default id. This option allows selecting the default filter value by id.
- Force numeric values. Transform attribute values to numeric
- Use Custom tags. Choose tags for filter titles. Any settings you leave blank will default
- Order by custom. Attributes are displayed according to the order of their selection in the input fields.
- Show count. Show count display the number of products that have the appropriate parameter.
- Hide attributes without products
- Attributes .Here you may select attributes to be displayed on your site from the list. If you want to select several attributes, hold the “Shift” button and click on names. Or you can hold “Ctrl” and click on names. Press “Ctrl” + “a” for checking all names.
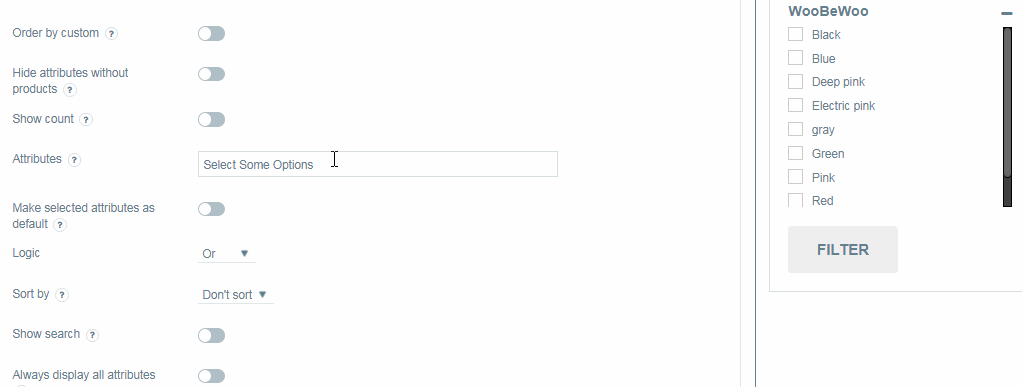
- Make selected attributes as default. Selected attributes will be marked as default.
- Logic. Here you can select the filter logic “or” /”and”/”not in”
- Sort by. Here you may set attributes sorting by ascendance or descendance.
- Show Search. Show search display the bar for searching by attribute name in the filter
- Always display all attributes . If checked, the entire list of attributes will always be visible, otherwise only available for filtered items.
- Layout. Select a vertical or horizontal layout and set the count of columns.
- Maximum height in frontend. Set maximum displayed height in frontend
- If you have several filters based on different taxonomies on your pages, you have an option to set the logic between them. To do so, go to the Options >> Content and scroll down to the Multiblock Taxonomy Logic dropdown. The available options are OR and AND.

Still have questions? Read our detailed documentation or Contact us and we will be happy to help you