WooCommerce Product Filter has very flexible settings that you can easily customize to the style and functionality of your store.The Options tab is logically divided into 4 tabs, for ease of use. This tutorial will help you understand the options on the Buttons tab.

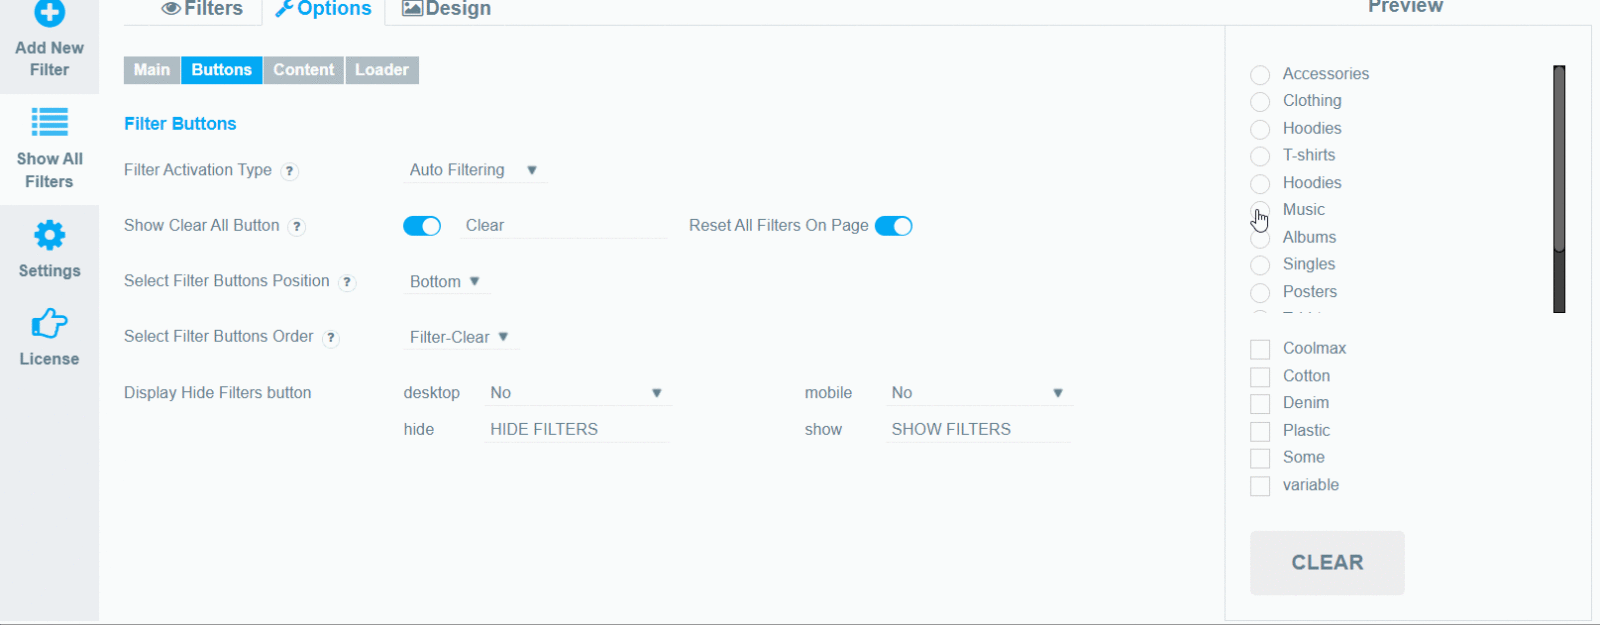
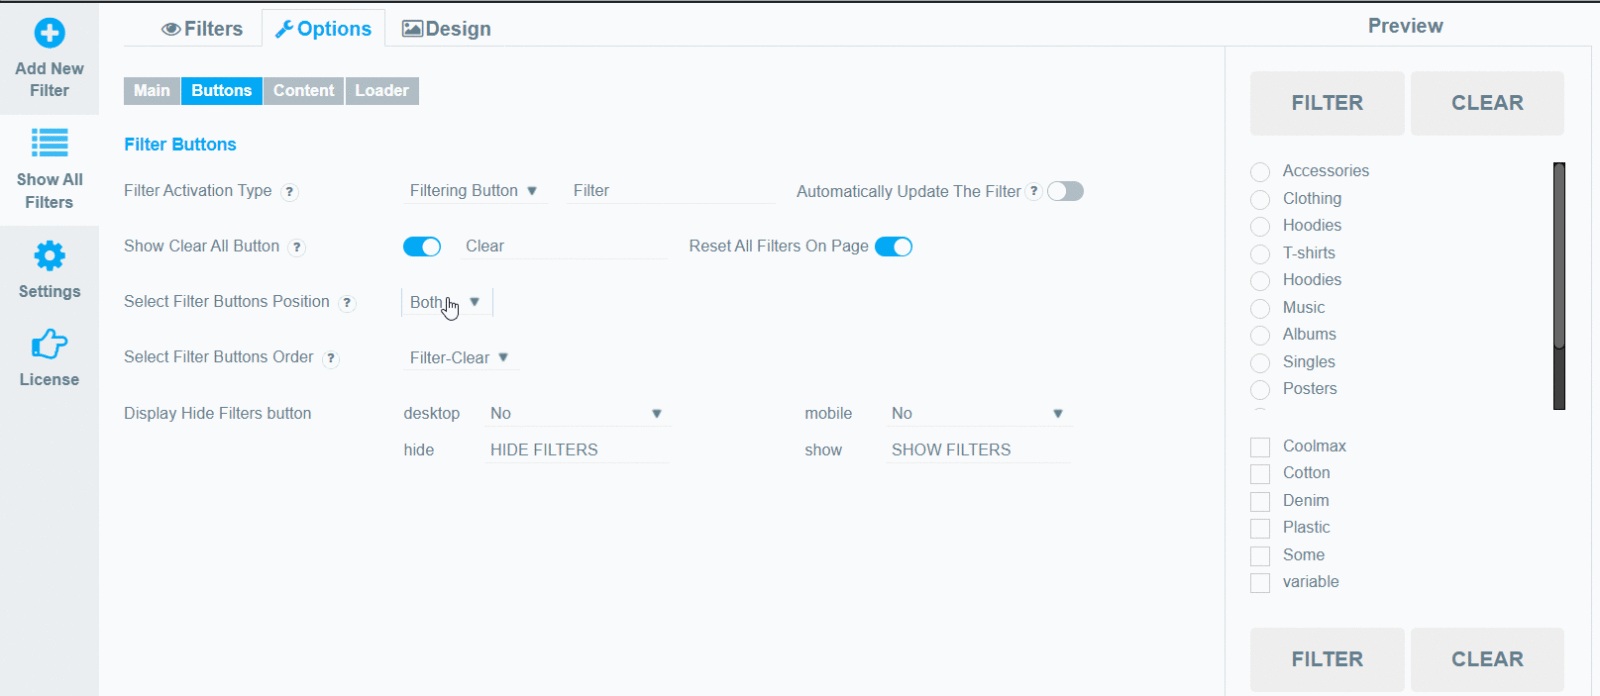
Filter activation type
- If the “Filtering button” option was selected, the “Filter” button appears on the page. It allows users to set all necessary filter parameters before starting the filtering. You can also change the name of the button to any text.
- Automatically Update The Filter. When you select one filter element, the rest of the elements will be updated based on it.

- If “Auto filtering” option was selected, filtering starts as soon as filter elements change and the data reloads automatically.

Show Clear All Button
If this option is enabled, the “Clear” button appears at the page. All filter presets will be removed after pressing the button. You can also change the name of the button to any text. Besides, you can enable the Reset All Filters On Page option.
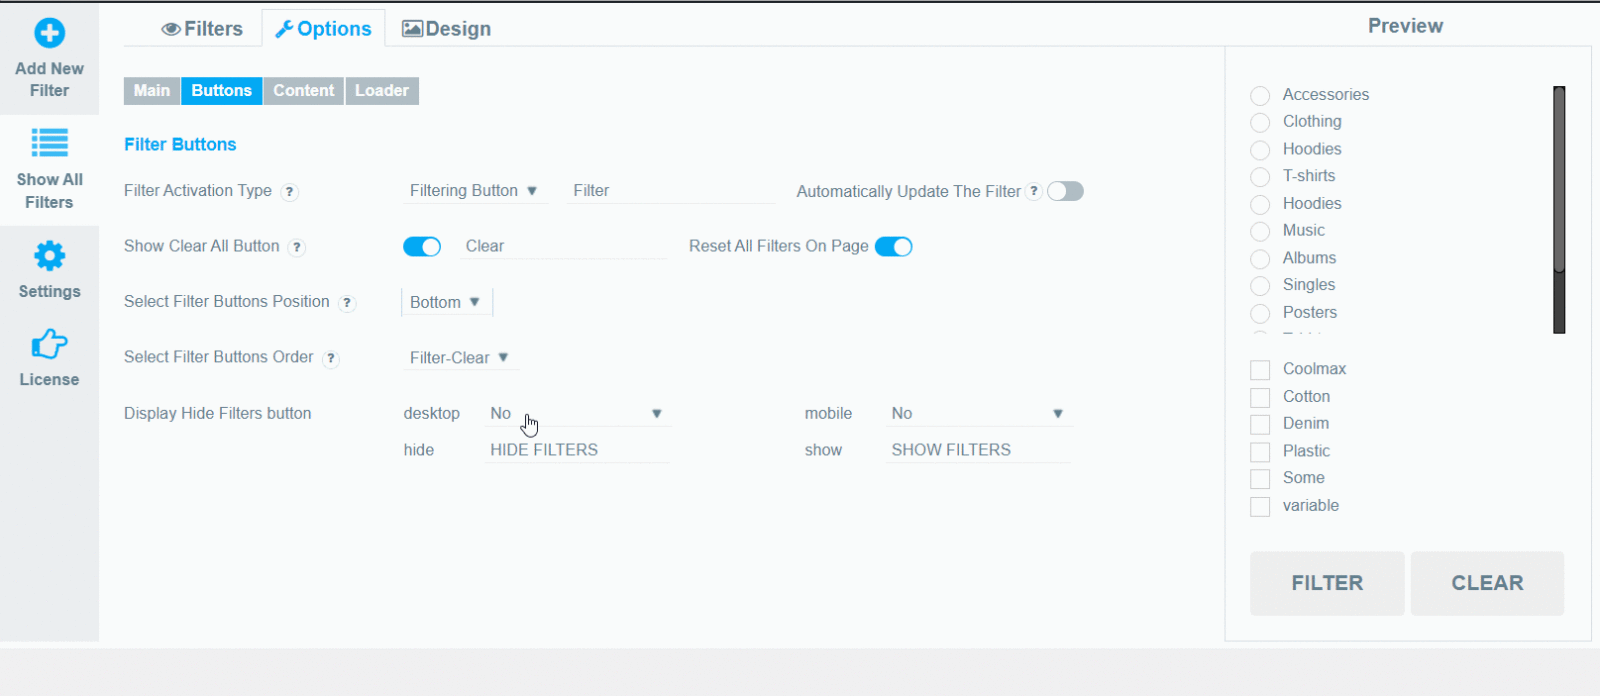
Select Filter Buttons Position and Order
- Select Filter Buttons Position. Here you may select the position of filter buttons on the page: Top;Bottom;Both.
- Select Filter Buttons Order. Here you may change the order of filter buttons on the page.
Display Hide Filters button
By default, the button is not displayed.
Choose how the button will be displayed on Desktop and mobile:
Choose how the button will be displayed on Desktop and mobile:
- No.
- Yes, show as close
- Yes, show as opened.
You can also change the name of the button to any text.
Floating button
If you set either to Yes, show as close or Yes, show as opened for mobile devices, you’ll get an opportunity to use the Floating button.
Please note that you need to set the mobile breakpoint in the Option >> Main >> Set Mobile/Desktop Breakpoint.
When you turn on the floating button, you need to configure its parameters.

Read this tutorial to learn how to improve your product filter buttons design.
As you can see, our plugin offers you a very functional filter with a convenient and simple interface.
Check out our documentation to learn more about other WooCommerce Product Filter options.
Also, if you have any questions, please contact us and we will be happy to help you.
Check out our documentation to learn more about other WooCommerce Product Filter options.
Also, if you have any questions, please contact us and we will be happy to help you.