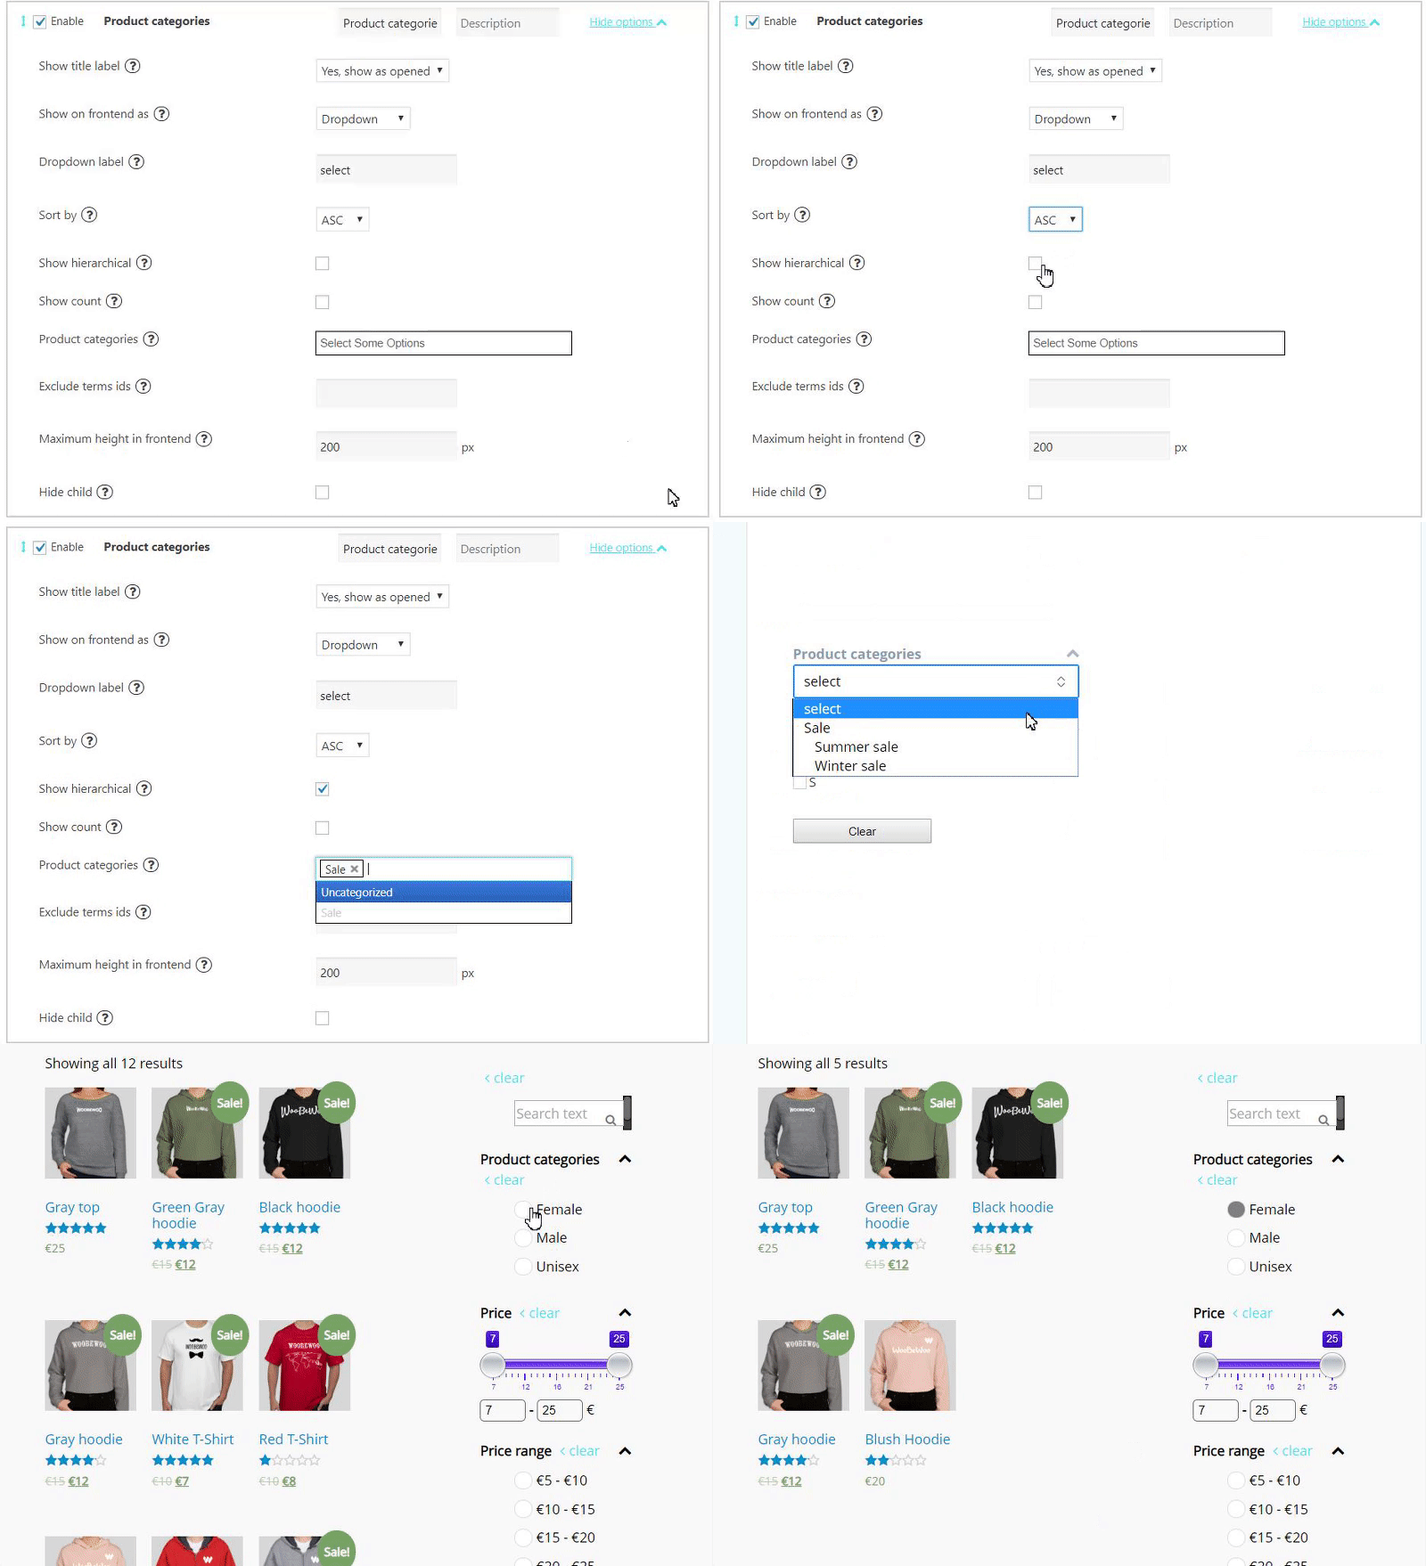
In this tutorial, we will consider the main steps to set up the product categories.
Each product you’re planning to sell should be listed as a WooCommerce product.
Create the Categories
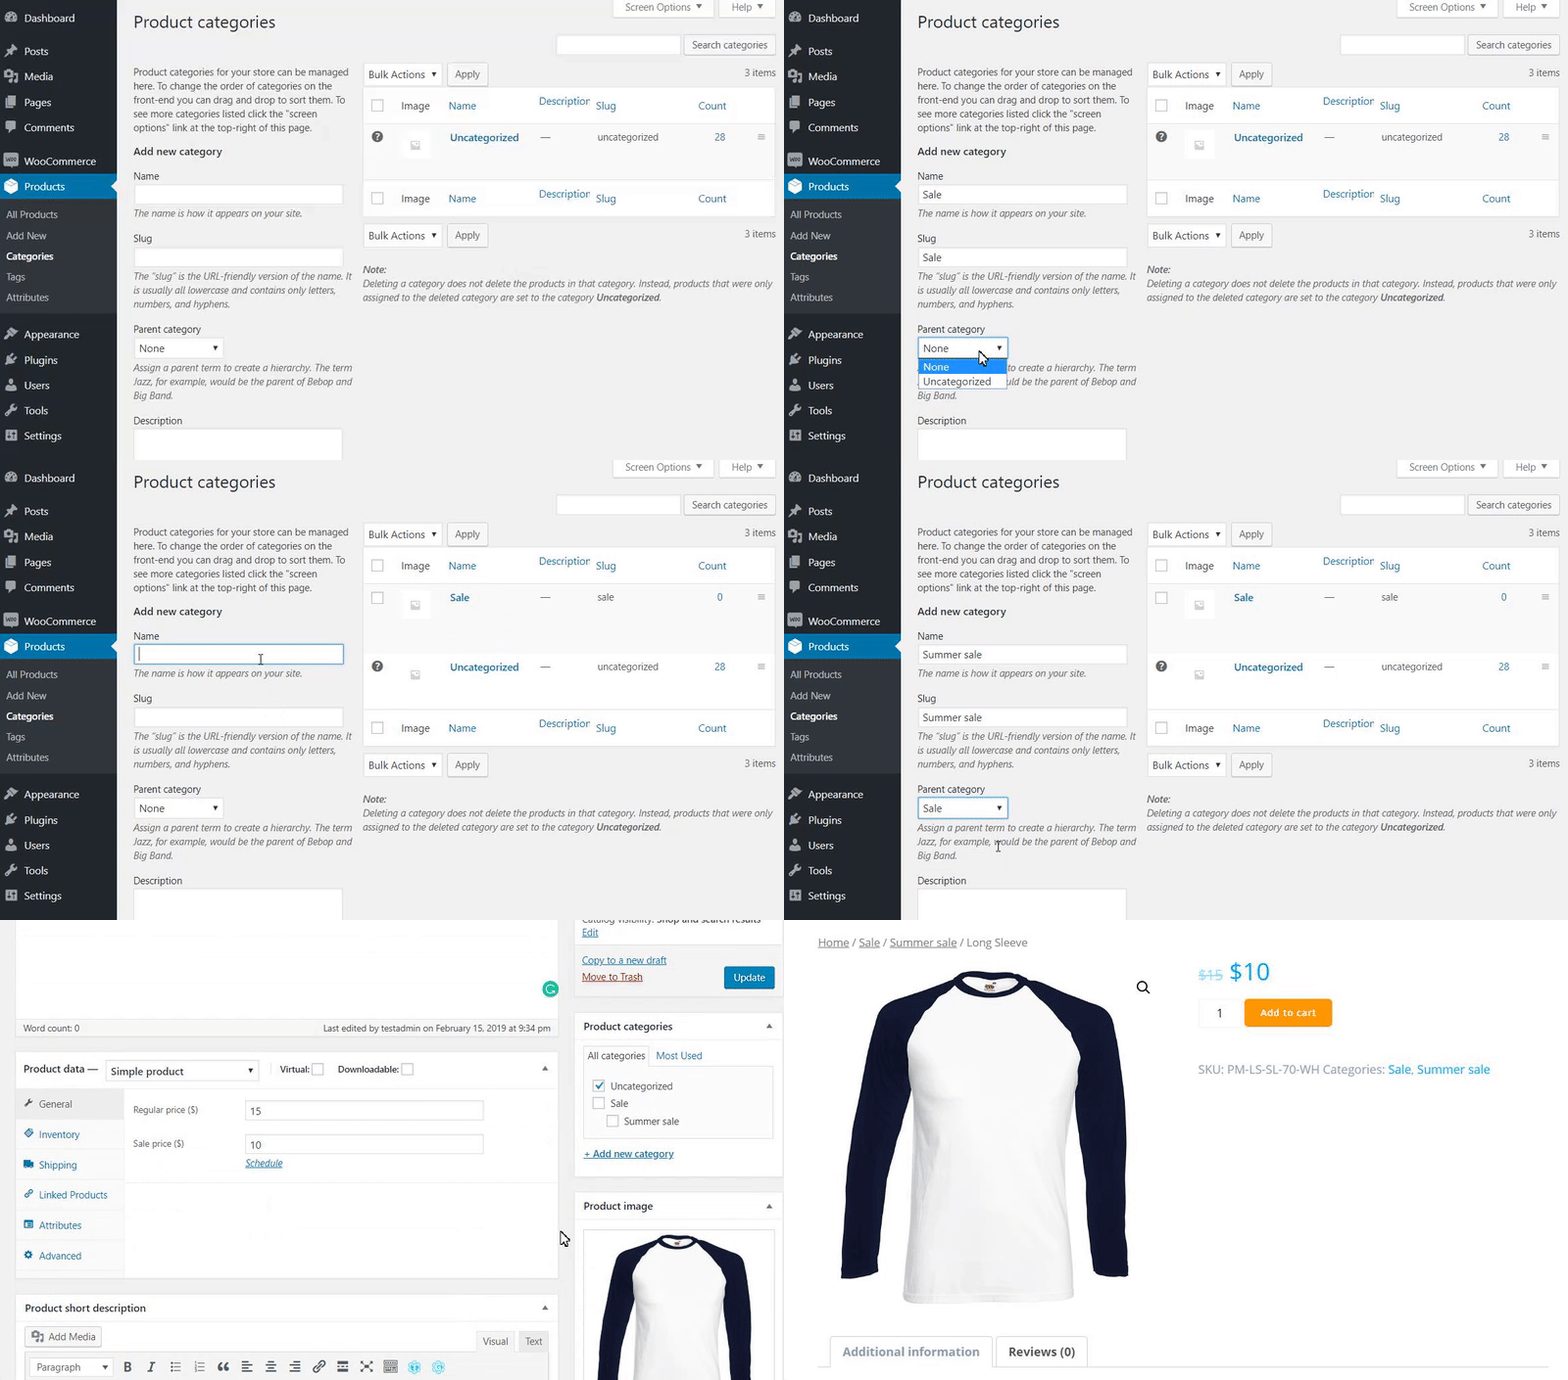
In order to set the product Categories, move to the WooCommerce -> Products – Attributes section:
Product categories for your store can be managed here. To change the order of categories on the front-end you can drag and drop to sort them.

Set a name (f.e. Sale), a slug, select parent category and fill description (optional) and press the “Add new category” button. A new category will appear in the list.
Add the Category to the product
Open a product, move to the right panel, Categories section, and add new category/select Parent category:

Also, you can add a new category as well. Notice, that you can add more than one category for each product.
Here you can see a short video instruction step by step:
Categories Filter settings
Now you can use created attributes for filtering by Categories in the Product Filter Plugin:

Here you can:
- Edit Filter title and description.
- Show in front-end as checkbox list or drop-down. Depending on whether you need one or several categories to be available at the same time, you may show your categories list as checkbox or drop-down.
- Set a Drop-down label(working with enabled Show on frontend as Dropdown).
- Product selection. Choose the way of displaying products: Should be at least in one category or Should be in all selected categories(working with enabled Show on frontend as Checkbox list).
- Show images feature allows you to show the category image(not working with dropdown).


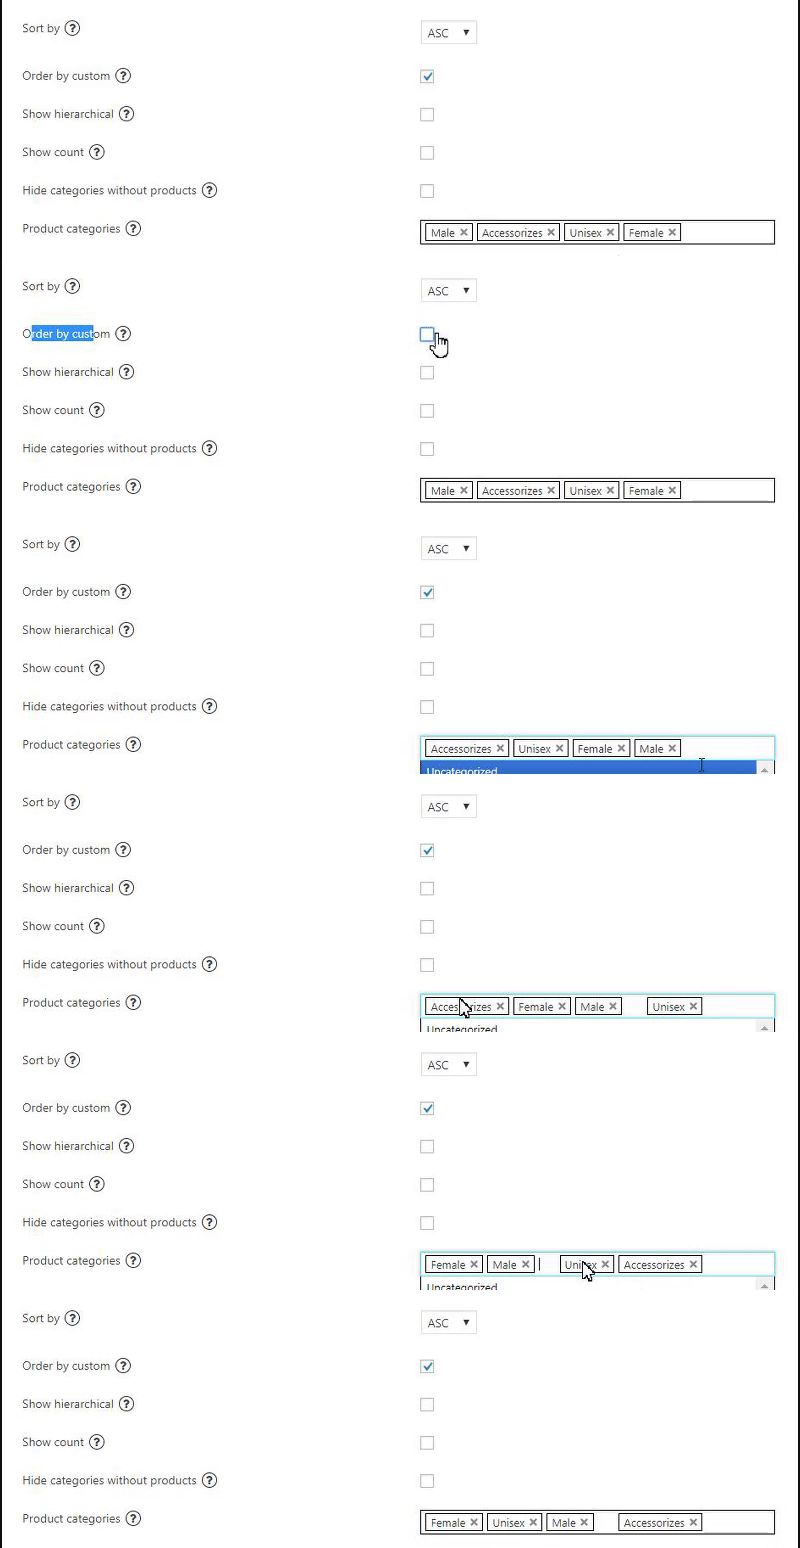
- Sort by. Here you may set categories sorting by ascending or descending price.
- Order by custom. Categories are displayed according to the order of their selection in the input fields.
- Show hierarchical. Show paternal and subsidiary categories (for checkbox list).
- Enable Show count.
- Hide categories without products. Do not show filter option if there are no products with such category.
- Product categories. Here you may select product categories to be displayed on your site from the list. If you want to select several categories, hold the “Shift” button and click on category names. Or you can hold “Ctrl” and click on category names. Press “Ctrl” + “a” for checking all categories.
- Clear filter only to selected categories. When the filter is clear, he will be filtered only by selected items. Be careful when using two or more category filters!
- Exclude terms ids. Here you may exclude category terms from the filter by ids. Example input: 1,2,3
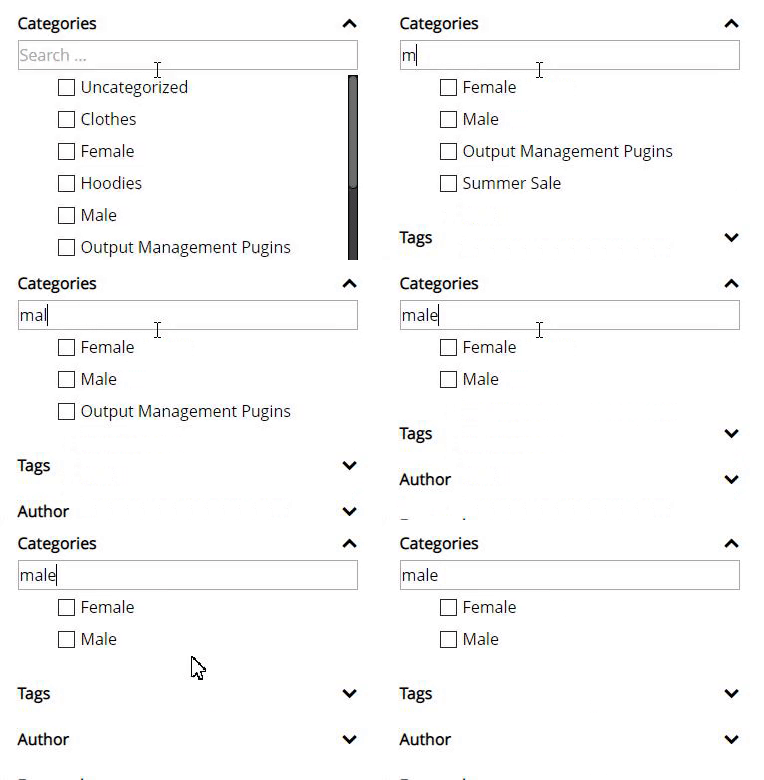
- Show search – enable if you need to add a field for searching by categories

- Maximum height. Set maximum displayed height on front-end.
- Hide child. Hide child taxonomy.