First of all, we would like to thank you for using WooCommerce Currency Switcher Plugin. Currency Plugin allows you to display prices in multiple currencies, use an unlimited number of currencies and set the exchange rate for each currency manually or automatically. The following guide will help you to set up our plugin and increase the reach of your site to an international level in no time. Let’s get started!
- Currencies
- Options
- Frontend Switcher
- Tooltip
- Currency Converter
- Currency Rates
- Custom CSS
- Geo IP rules
- Custom Flags
- Custom Currencies
Move to WooCommerce > Setting > Currency.
![]()
Before configuring the Currency Switcher Plugin, you should decide which currencies you are going to show on your site.
Our recommendation is to enable only the currencies that are most important to your business, as enabling too many could make the site confusing.
Currencies Tab
In the Currency tab firstly you can set your WooCommerce shop basic currency. Then choose currencies you want to add from drop-down lists and set the exchange rate for each currency. You can hold and drag the cursor on the row to change the position of the currency.
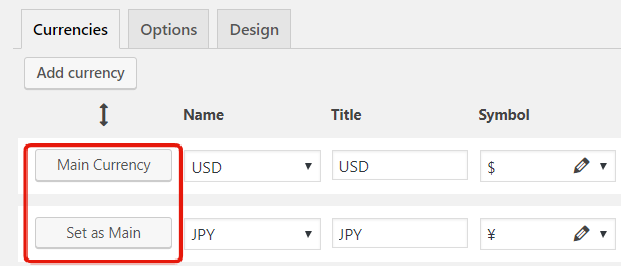
Here are the following settings available:
- Set the base currency. This currency will be displayed as the default value in the Switcher and will give the starting point for getting the exchange rate for the other currencies.
- Currency code. Select the currency.
- Flag. Flag icon will be automatically added in appliance with selected currency after you save the settings. You can select any required flag from the list.
- Title. Enter currency Title, f.e: pound for the GBP, dollar for the USA etc.
- Symbol. Select currency symbol or just type and add Custom Symbol (Pro).
- Position. Select the position of the currency sign.
- Cents. Show/Hide Cents on Front to Currency.
- Converter rates. This rate is updated automatically with a selected Currency Aggregator.
Enter exchange rates manually. You can choose this way to define a fixed currency exchange rate and avoid any fluctuation in the exchange market. It will require you to keep an eye on the market and change the values accordingly. You can set the exchange rates manually as follows:
- Manual Rate. This value overwrites the automatic rate from field Converter Rates. Input value in the following format example: 12.5035
- Click the Manual Rate column, next to the currency for which you would like to set the exchange rate.
- Enter the exchange in the Manual Rate column. Important: you must enter a valid exchange rate, which must be numeric, greater than zero, and with the point as a decimal separator, or the Currency Switcher will consider the rate invalid. The formatting of the prices on the frontend will still use the decimal separator you configure for the currency.
- Please, click the “Save Changes” button after all the changes you made.
Options tab
The plugin makes full use of Cryptocompare and Free Converter, RatesApi, The Free Currency Converter by European Central Bank aggregators which are providing the latest exchange rates, and substitute displayed prices in real-time. You can select the rate using these interactive platforms and grab the latest exchange rates.
Put the free Converter API key of the converter in this field. Read instructions on how to get a free API key for the converter. If the field is empty, Free Converter will use the default API key – this may create an error when getting the exchange rate.
Automatic exchange rates updates (Pro) allows to update the rates by a certain period: every minute, hourly, twice a day, daily, weekly or manual.
![]()
Frontend Switcher tab
With Currency Plugin, you can make the Currency Switcher not only functional but also match the website design.
Firstly, you can select the type of switcher. Every type have slightly different settings:
Simple type displays the Switcher like a bar.

- Design. Here are 2 modes: Classic or Drop-down.
- Toggle Switcher – the panel can be displayed by mouse hover or click.
- Show – You can select what to display: Flags, Currency codes or Currency symbols.
- Icon size – choose icon size for Currency Switcher Simple (small, middle or large).
- Layout – choose a horizontal or vertical panel layout design.
- Position – choose a basic position of the panel (left or right).
- Icon spacing – set the distance between currency blocks (margin)
- Show border – show panel outer border.
- Border-radius – set panel border-radius in
- Border colour – choose panel border color.
- Text colour – choose a panel text colour for static and hover elements.
- Background colour – choose a panel background colour for static and hover elements.
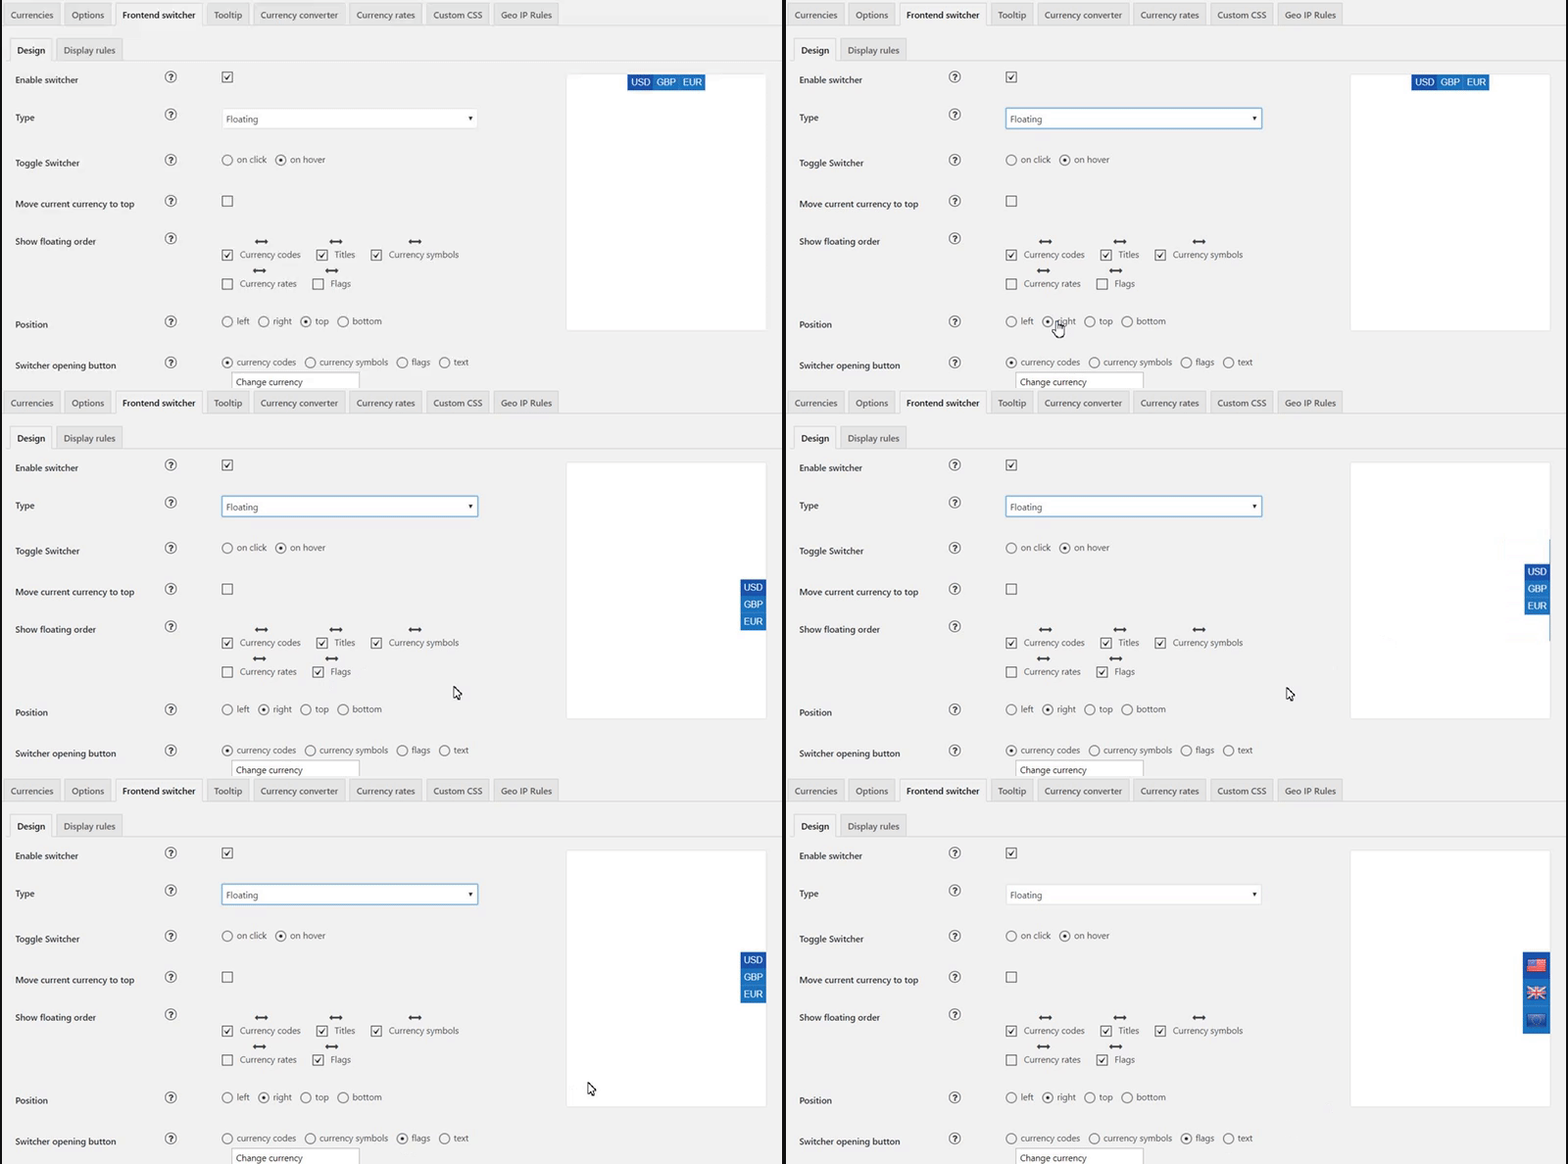
Floating type saves space on your store page and floating by mouse-over or by click.
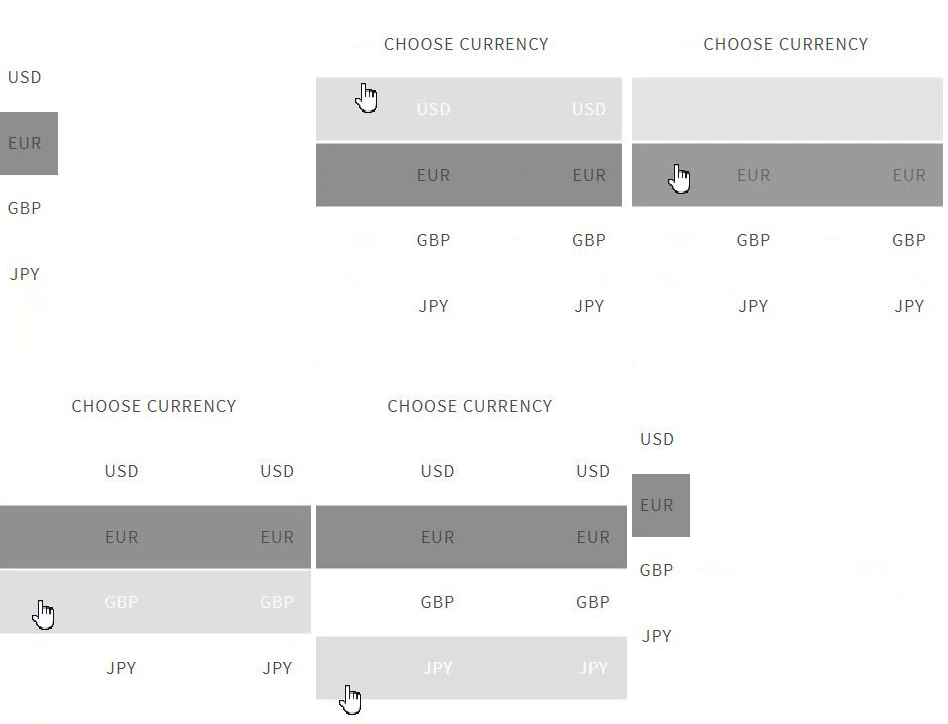
- Toggle Switcher – the panel can be displayed by mouse hover or click.
- Move current currency to the top – show current currency at the top of the panel.
- Show floating order – set the display order and what to display in the list: Currency codes, Titles, Currency symbols, Currency rates, Flags.
- Position – choose a basic position of the panel: left, right, top, bottom.
- Switcher opening button –
- Switcher opening button font setting – set the switcher opening button font setting.
- Panel opening button size – choose a size for an opening button.
- Show current currency only – show only the current currency in opening button.
- Vertical and Horizontal offset – change horizontal and vertical panel offset (only for left and the right position for Floating or Rotating type) for mobile and desktop in px and %.
- Show border – show panel outer border.
- Border colour – choose panel border color.
- Panel header and Panel text font setting.
- Text colour – choose a panel text colour for static and hover elements.
- Background colour – choose a panel background colour for static and hover elements.
Rotating type has the animation and creative form and design.
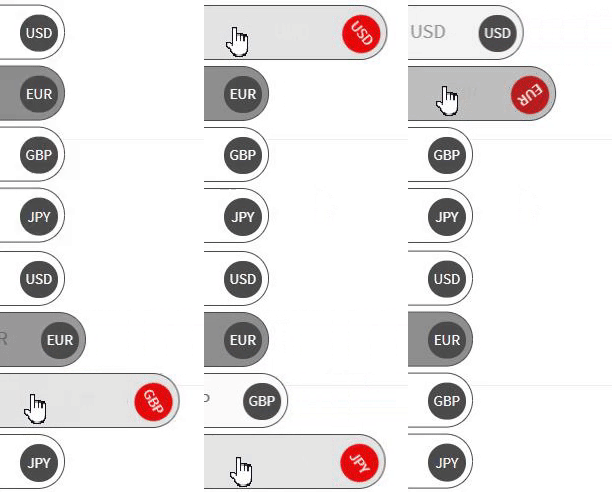
- Toggle Switcher – the panel can be displayed by mouse hover or click.
- Move current currency to the top – show current currency at the top of the panel.
- Show flags – show currency flag in Currency Switcher Rotating.
- Position – choose a basic position of the panel: left, right.
- Vertical offset – change vertical panel offset for mobile and desktop in px and %.
- Transparent – change the level of transparency for the panel.
- Show border – show panel outer border.
- Border colour – choose panel border color.
- Text colour – choose a panel text colour for static and hover elements.
- Background colour – choose a panel background colour for static and hover elements.
- Rotating block text and background colour – choose a colour for static and hover elements.
All the changes you can see immediately in the preview window.
Display Rules
The mode allows you to set the conditions for displaying the switcher and show it on All pages, on selected pages or posts.
![]()
- Show on – select the devices on which the panel should be displayed.
- Show on screen – if this option is selected, the panel will be displayed only under the selected conditions, f.e:

- Display everywhere – select pages from the list on which you want to display the panel or select “Enable” to display the panel on each page.
- Pages/ Product categories/ Custom post types– enable and select page or post from the list on which you want to hide a module.
Save changes.
Shortcode and PHP code
In this tab, you can copy the shortcode and insert into the page or theme code to display a module.
You are able to add additional parameters to the shortcode:'currency_display' => 'name', (name, title) 'show_as' => 'dropdown', (dropdown, flags) 'show_flag_dropdown' => false, (false, true) 'width' => '100%', 'exclude' => array(), (CODE of Currency ex. UAH) 'show_on' => 'both', (both, desktops, mobiles) 'show_on_widths' => 0, 'show_on_screen_compare' => 'less', (less, more) 'show_on_widths_value' => ''
For example, if you need to display the switcher as a dropdown with flags, add these parameters to the shortcode:
[woo -currency-switcher show_as=dropdown show_flag_dropdown=true]
Tooltip
![]()
Design
- Position – choose a basic position of the panel.
- Text colour – сhoose panel text colour.
- Text size – сhoose panel text font size.
- Background colour – сhoose panel background colour.
- Show border – show panel outer border.
- Border-radius for an opening button – set an opening button border-radius.
![]()
Display Rules
The mode works in the same way as for Switcher, Converter and Currency rates.
It allows you to set the conditions for displaying the switcher and show it on All pages, on selected pages or posts.
- Show on – select the devices on which the panel should be displayed.
- Show on screen – if this option is selected, the panel will be displayed only under the selected conditions, f.e:

- Display everywhere – select pages from the list on which you want to display the panel. Press Ctrl to select more than 1 page or post.Check the “Enable” to display the panel on each page. Also, you can display it for certain categories and for custom post types.
Currency Converter
Design
- Toggle panel – the panel can be displayed by mouse hover or click and full-size view.
- Layout – choose a horizontal or vertical panel layout design.
- Panel width – choose panel width in px.
- Position – choose a basic position of the panel (left, right, top, bottom).
- Vertical and Horizontal offset – change horizontal and vertical panel offset for mobile and desktop in px and %.
- Transparent – change the level of transparency for the panel and opening button.
- Enable dropdown flag – enable currency flag in dropdown select.

- Show in currency dropdown – set the display order and what to display in the dropdown select list:
- Text colour – choose a text colour for the opening button.
- Background colour – choose a panel background colour for the opening button.
- Panel opening button text – type your text for the opening button.
- Show border – show opening button outer border.
- Border-radius for an opening button – set an opening button border-radius
- Show header – show panel title.
- Panel header text – type your text for panel title.
- Outer border and colour – show panel outer border.
Also, you can set a colour and font for any type of element:
- header text
- header background
- panel text
- panel background
- button text
- convert button background
- convert button hover
Display Rules
The mode works in the same way as for Switcher, Tooltip and Currency rates.
It allows you to set the conditions for displaying the switcher and show it on All pages, on selected pages or posts.
- Show on – select the devices on which the panel should be displayed.
- Show on screen – if this option is selected, the panel will be displayed only under the selected conditions, f.e:

- Display everywhere – select pages from the list on which you want to display the panel or select “Enable” to display the panel on each page.
- Pages/ Product categories/ Custom post types– enable and select page or post from the list on which you want to hide a module.
Save changes.
Shortcode and PHP code
In this tab, you can copy the shortcode and insert into the page or theme code to display a module.
'currency_display' => 'name',
'show_flag_dropdown' => false,
'layout' => 'vertical',
'btn_txt_color' => 'white',
'btn_bg_color' => '#333',
'btn_bg_color_h' => '#e58004',
'width' => '100%',
'exclude' => array(),
'show_on' => 'both',
'show_on_widths' => 0,
'show_on_screen_compare' => 'less',
'show_on_widths_value' => '',
For example, if you need to display the switcher as a dropdown with flags, add these parameters to the shortcode:
[woo -currency-converter exclude='USD,GBP' layout=horizontal show_flag_dropdown=true]
Currency Rates
Currency Rates allows you to get exchange rates for all currencies in the list by selected currency.
![]()
Design
- Toggle panel – the panel can be displayed by mouse hover or click and full-size view.
- Panel width – choose panel width in px.
- Position – choose a basic position of the panel (left, right, top, bottom).
- Vertical and Horizontal offset – change horizontal and vertical panel offset for mobile and desktop in px and %.
- Transparent – change the level of transparency for the panel.
- Show border – show panel outer border.
- Enable dropdown flag – enable currency flag in dropdown select.
- Show in currency dropdown – set the display order and what to display in the dropdown select list:
- Show in currency list – set the display order and what to display in the list: flags,
- Panel opening button text – type your text for the opening button.
- Text colour – choose a text colour for the opening button.
- Panel opening button size – choose a size for the opening button.
- Background colour – choose a panel background colour for the opening button.
- Show border – show opening button outer border.
- Border-radius for an opening button – set an opening button border-radius
- Panel header text – type your text for a panel title.
- Show the inner and outer border and colour – show panel border.
- Rows stripping – enable background striping in the panellist.
- Show outer border – show outer border for a panel.

Also, you can set a colour and font for any type of element:
- header text
- header background
- panel text
- panel background
Display Rules
The mode works in the same way as for Switcher, Tooltip and Converter.
It allows you to set the conditions for displaying the switcher and show it on All pages, on selected pages or posts.
- Show on – select the devices on which the panel should be displayed.
- Show on screen – if this option is selected, the panel will be displayed only under the selected conditions, f.e:

- Display everywhere – select pages from the list on which you want to display the panel or select “Enable” to display the panel on each page.
- Pages/ Product categories/ Custom post types– enable and select page or post from the list on which you want to hide a module.
Save changes.
Shortcode and PHP code
In this tab, you can copy the shortcode and insert into the page or theme code to display a module.
You are able to add additional parameters to the shortcode:'currency_display' => 'name', 'show_flag_dropdown' => false, 'show_flag_currency_list' => false, 'width' => '100%', 'exclude' => array(), 'show_on' => 'both', 'show_on_widths' => 0, 'show_on_screen_compare' => 'less', 'show_on_widths_value' => '',
For example, if you need to display the switcher as a dropdown with flags, add these parameters to the shortcode:
[woo -currency-rates exclude='USD,GBP' show_flag_dropdown=true show_flag_currency_list=true]
Custom CSS
Geo IP rules
If you enable this feature, it allows you to automatically set the currency for visitors when they first visit the site.
if this option is enabled, currencies for your visitors will be set by default by the country code.
Use custom settings – if you want to specify the definition of the currency yourself, please select your list of countries for each currency. The option “Set currencies automatic by default with GeoIP” must be disabled.
![]()
Custom Flags
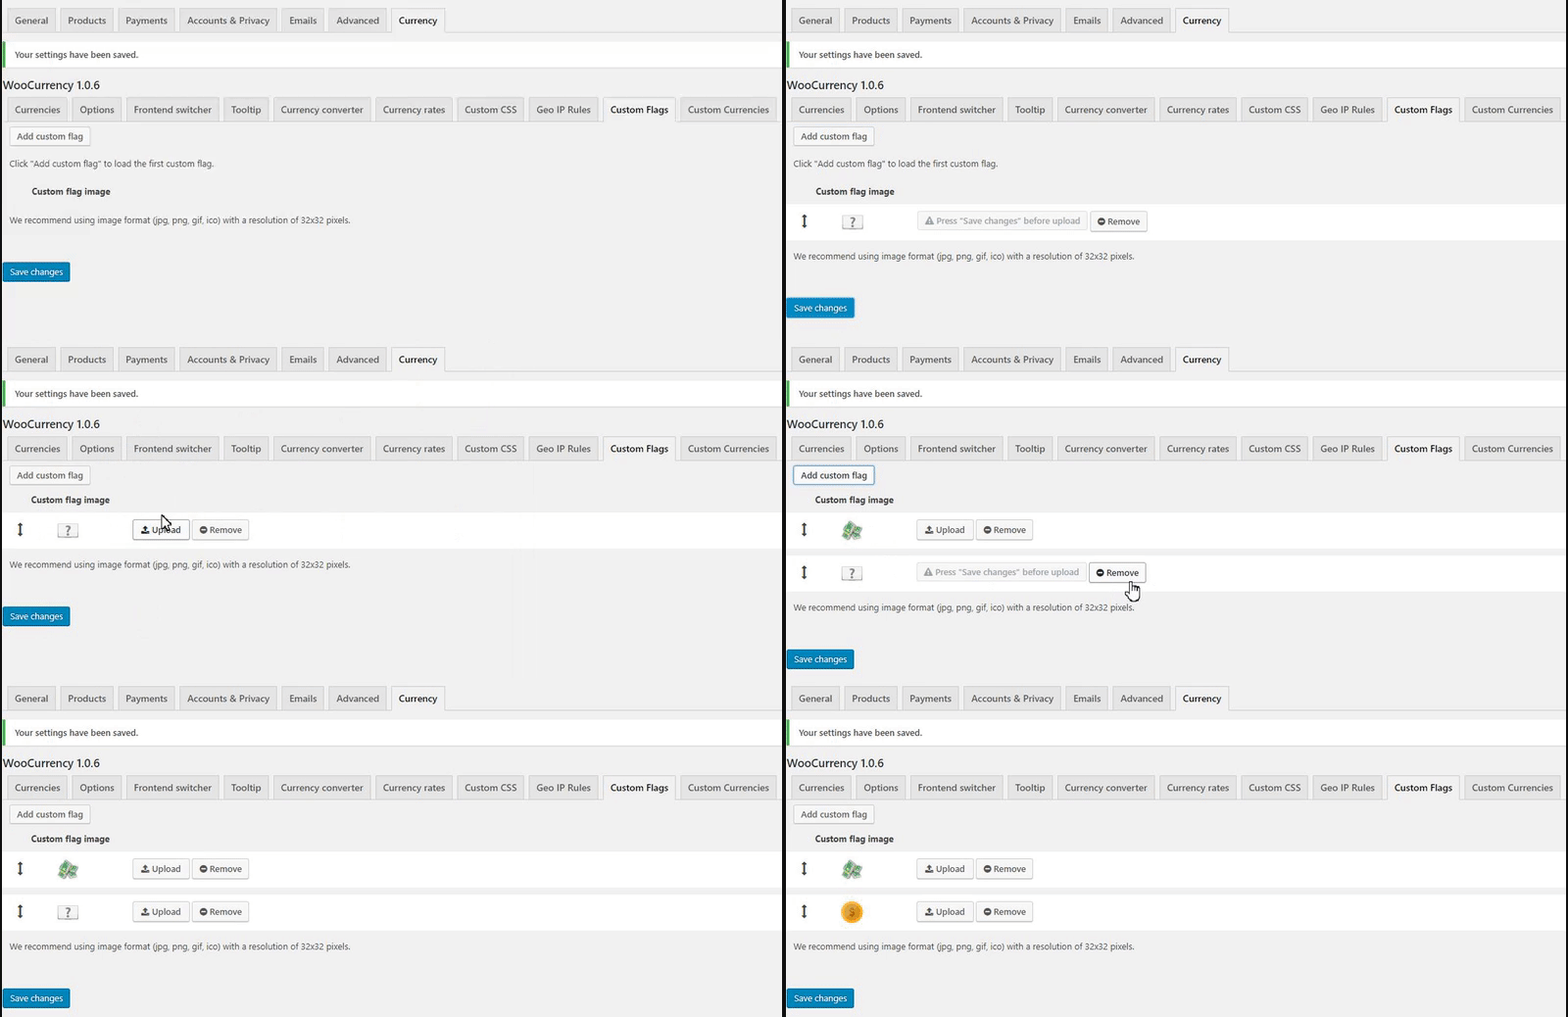
With Custom Flag feature (pro) you are able to upload your own flag icon.
After saving, the image is added to the database. It combined with other currencies and will be available in the basic tab currencies. On the Custom flags tab, you can view all the added custom icons and add or remove the previously uploaded ones.
![]()
In order to add your own image, move to the Custom currency tab, press “add a custom flag” and press “Save” before to upload an icon:
Custom Currency
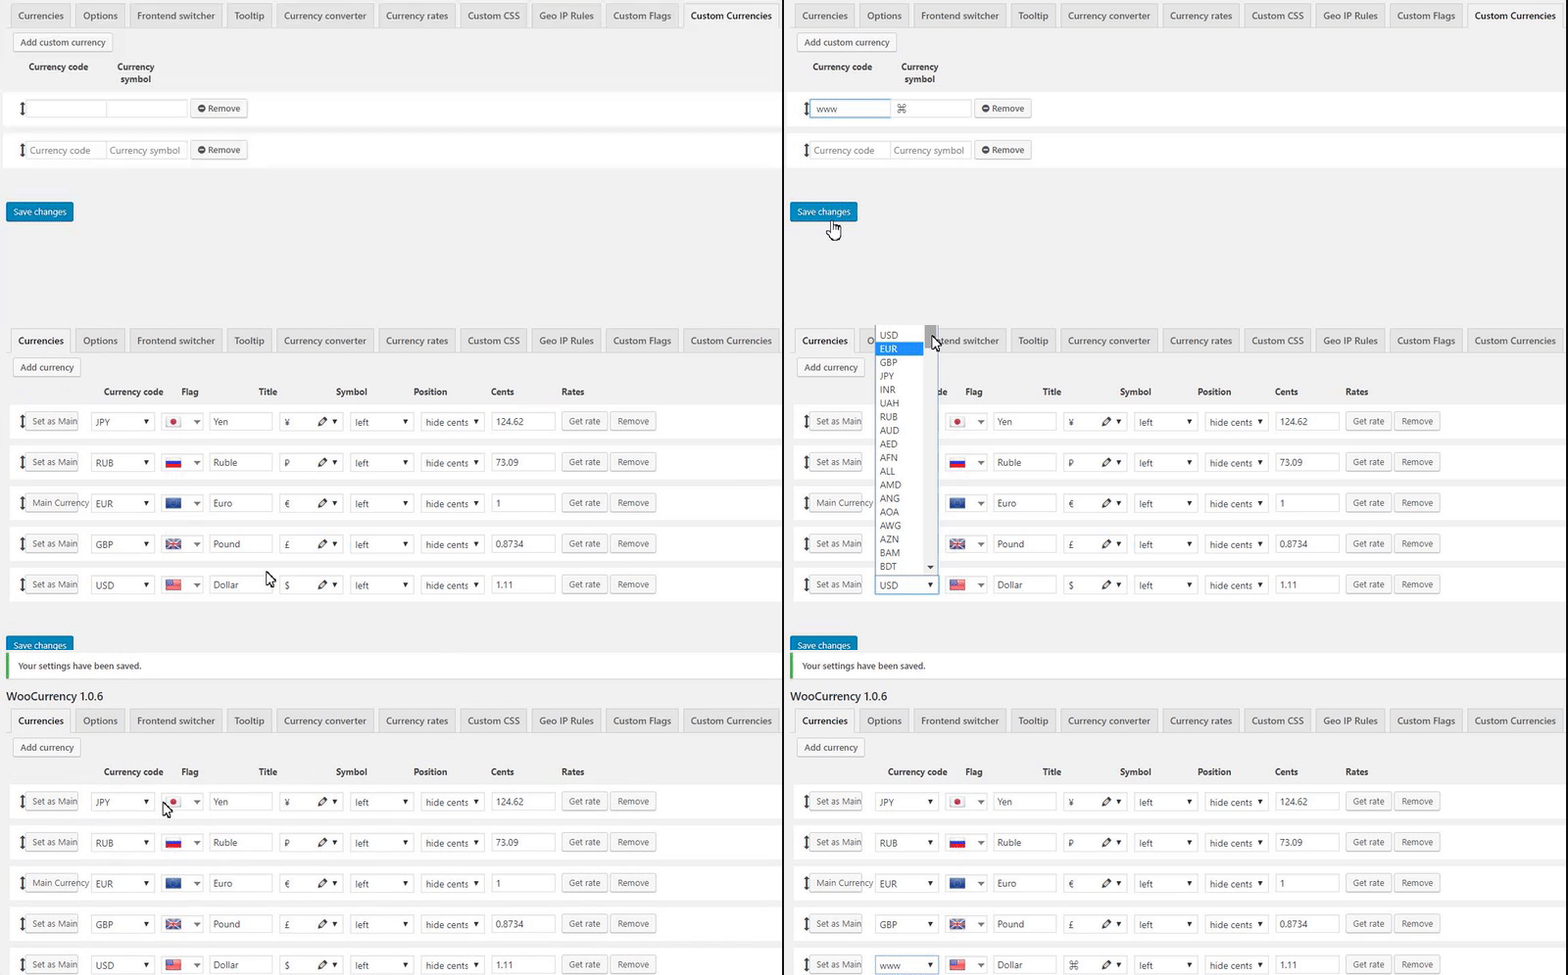
With Custom Currencies feature (pro), you are free to add your own currency in the same way. Move to the Custom Currency tab and enter a required code and symbol.![]()
Press saving and the plugin will add data to the database, ready to use and combined with other currency codes and symbols. Now it is available for selection in the Currencies tab. To make any changes come back to the Custom currency tab. There you can see all data and you are able to edit data or add and remove it.
