Create custom taxonomies quite easily using Custom Post Type UI that is fully compatible with WooCommerce Product Table.
This free plugin allows you to create a taxonomy and assign it to WooCommerce products or any other post type.
Once you have created a custom taxonomy, this will appear on the product page with a tick box for each taxonomy term. You can add taxonomy term in the same way as adding categories and easily display it in the product table.
What is custom taxonomy in WooCommerce?
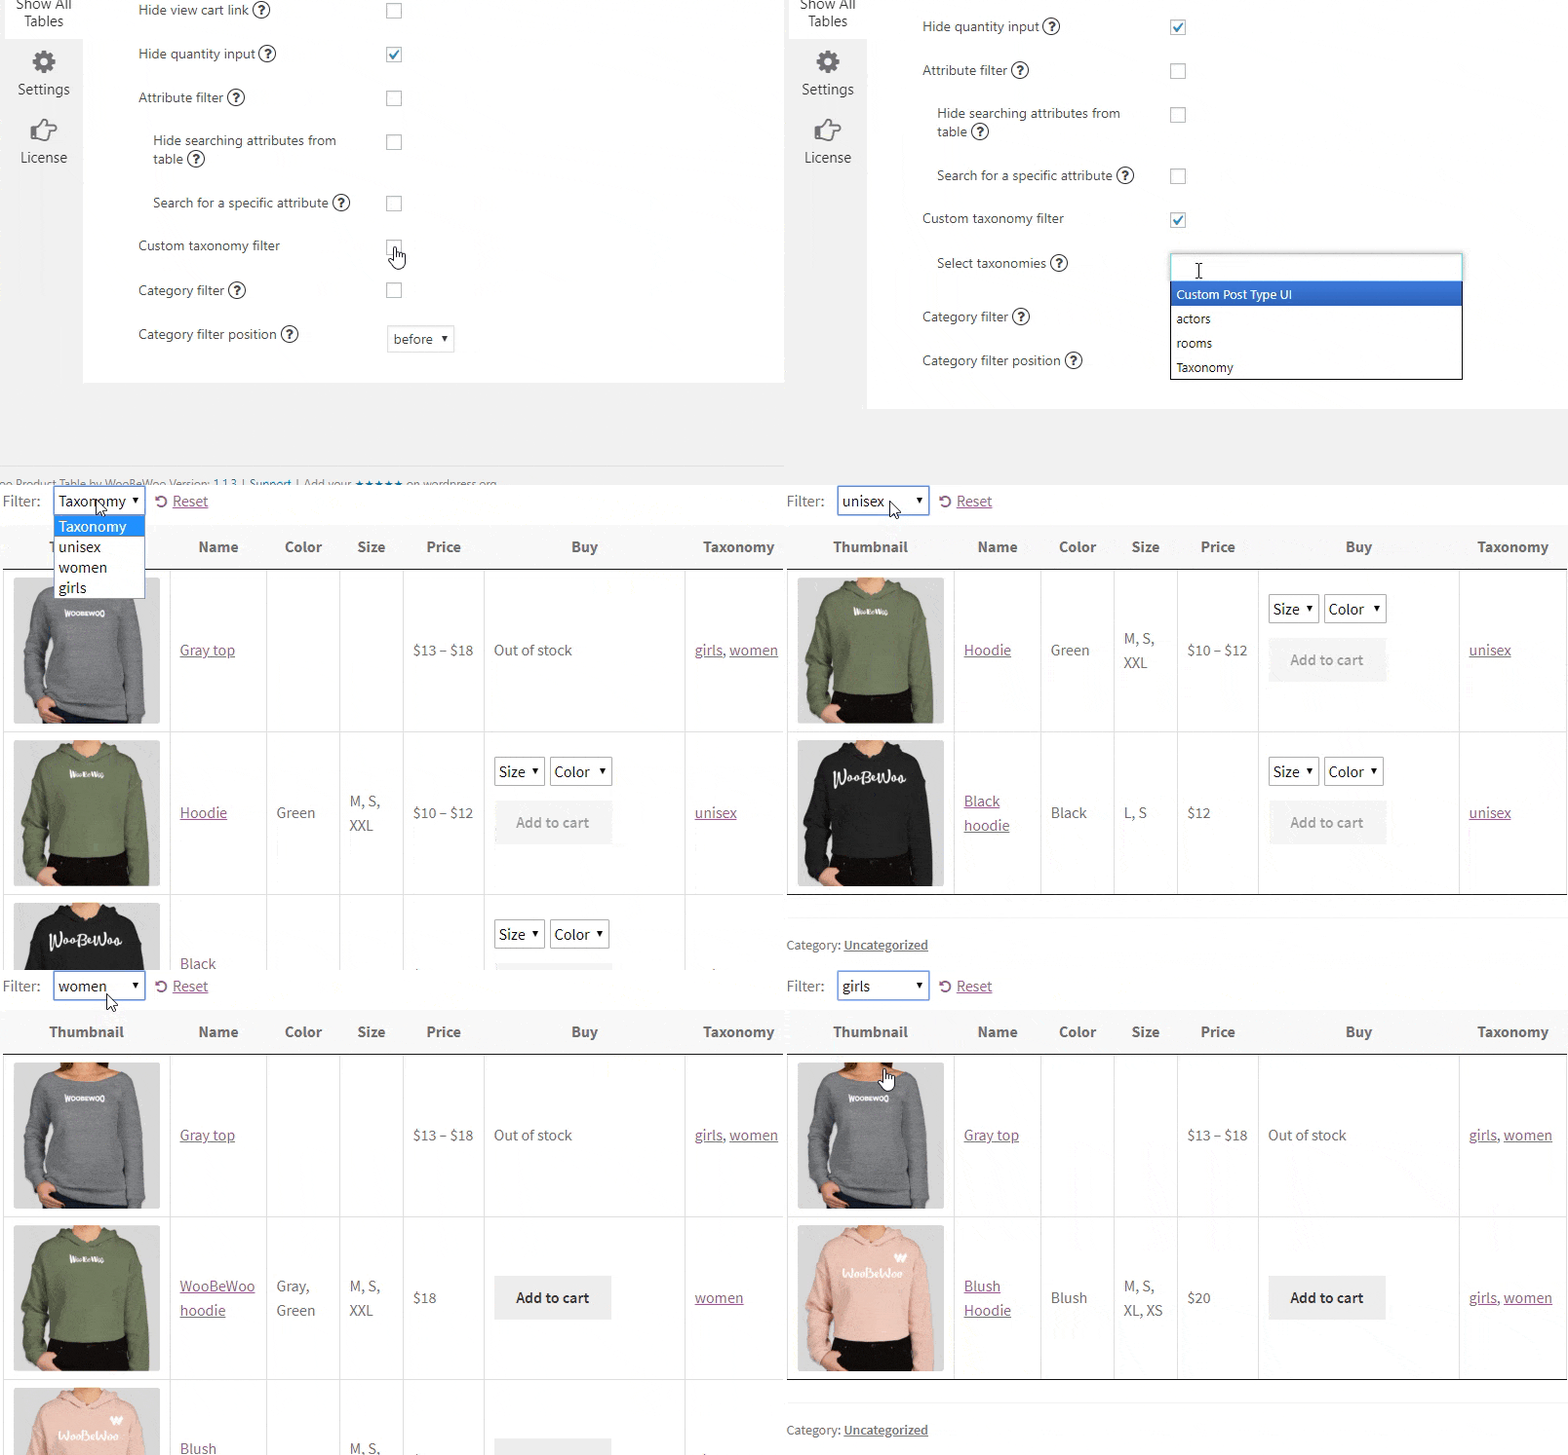
With the help of taxonomies, you can store and show extra product data. So, they are designed to store re-usable information which can be used to group and filter products. You can create a dedicated page listing all products that share a specific custom taxonomy term. You can also use taxonomies to filter products using the WooCommerce Product Table plugin.
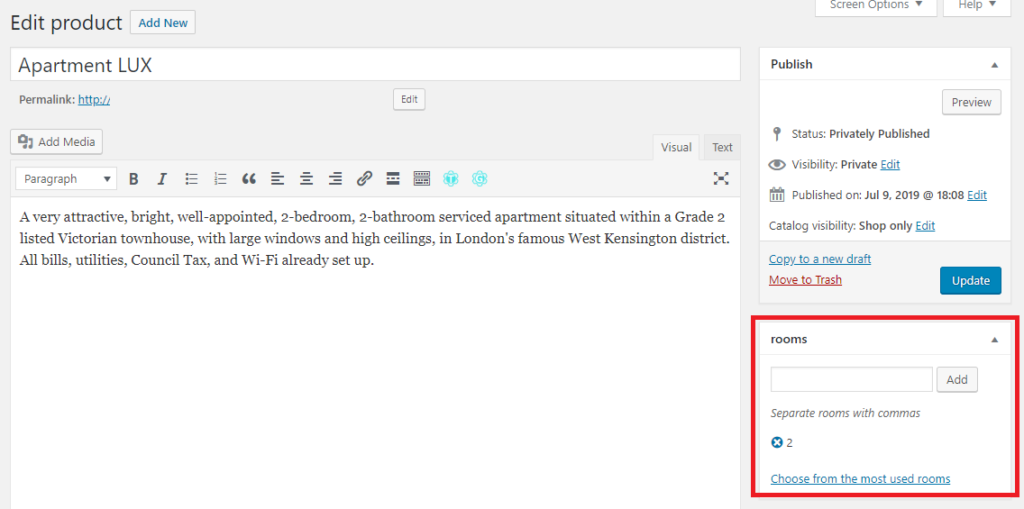
Custom taxonomies are very similar to WooCommerce product categories. When you create a custom taxonomy in WooCommerce, it adds a field on the right side of the Add/Edit Product – the same as categories.
How to create WooCommerce custom taxonomies with the Custom Post Type UI plugin
Follow this step by step tutorial to create taxonomies, add them to the product and display in the table:
- Installed the Custom Post Type UI
- Navigate to CPT UI -> Add/Edit taxonomies
- Add a Slug, Singular and Plural label.
- Select the “Products” as a Post type to attach.

- Make other necessary settings. All detailed instruction you can find in the plugin documentation.
- Press Add Taxonomy. Now new taxonomy will appear on the Product page:

- Add the value and update or publish a product page.
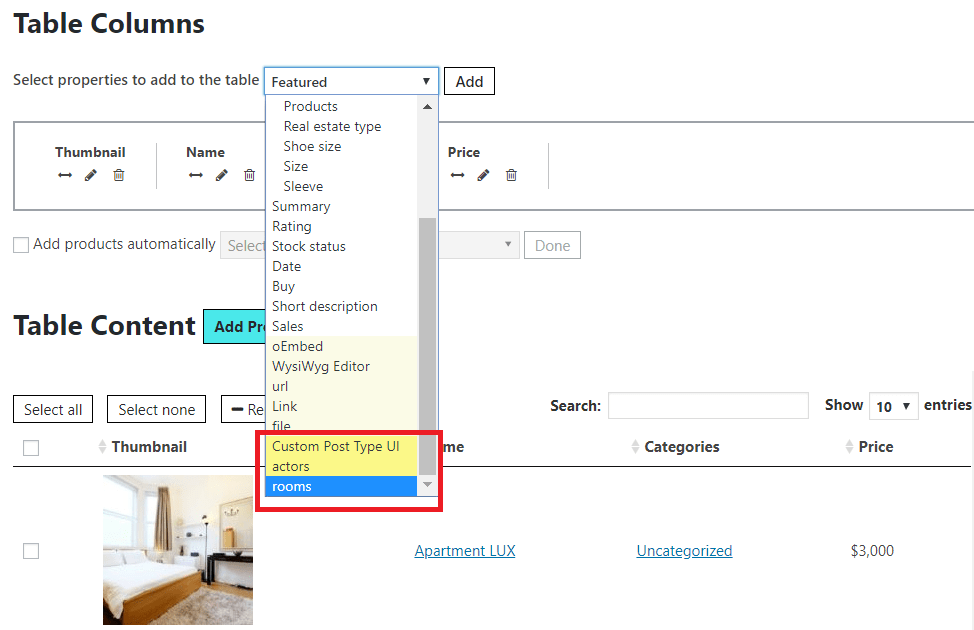
- Now, if you create the Product table, all the created Taxonomies will be displayed in the list of available columns and marked yellow colour.

- Select the Taxonomy, add the column and add the products according to the taxonomy.

- In order to add the Custom taxonomy filter, move to the Settings -> Features -> and enable Taxonomy filter. Select the terms and Save the settings.
