When customers visit your online store, how do they decide which product to buy?
The first things they look at are price, size, color, and other product specifications. These details, known as product attributes, play a crucial role in helping users make confident purchasing decisions.
In this article, we’ll explore how to display product attributes clearly on WooCommerce shop pages, so customers can compare products easily and choose the right option without unnecessary clicks.
What’s the Problem with Default WooCommerce?
It lies in a WooCommerce core code. While you can display all the necessary attributes on the individual product page, it is impossible to display them on the product listing pages. By default, you can find the product’s characteristics just under its image in the section Additional information.
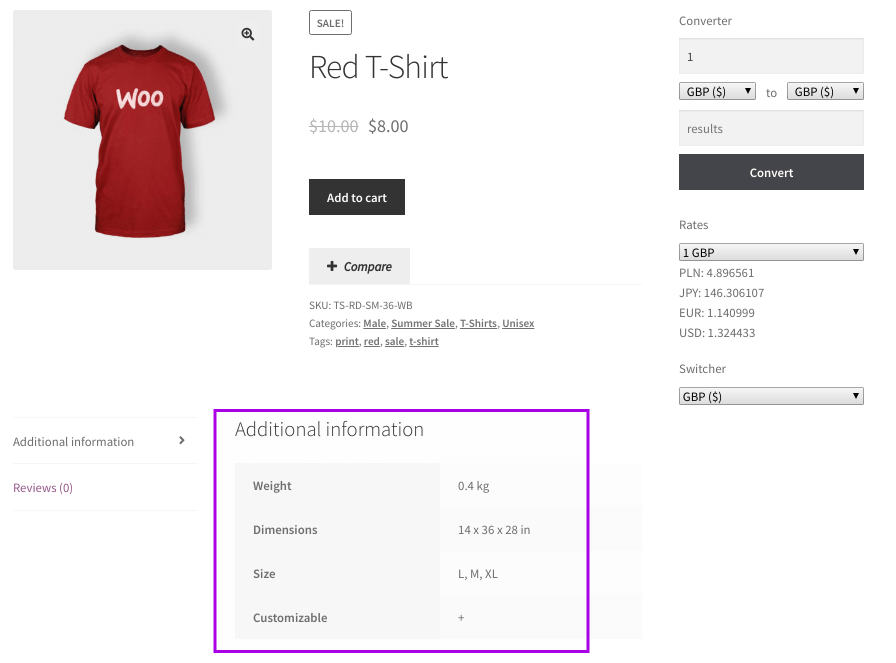
Block with additional information
It is enough if you run a store with two or three items, but what if you have a lot of different products? Probably, you’ll want to make their properties more visible and hold in one place, so users can easily browse and filter them. The solution is using another plugin. WooBeWoo Product Table plugin allows you to create a filterable and structured table, just like on the example below.
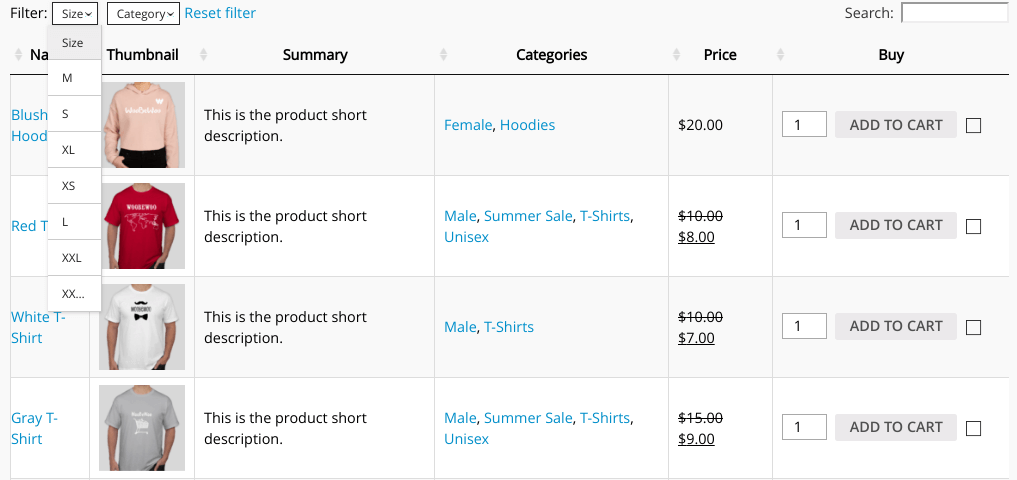
Product Table example
Why Product Attributes Should Be Visible in Product Listings
When attributes are scattered across multiple product pages, users struggle to:
-
Compare products efficiently
-
Understand differences at a glance
-
Filter items based on specific properties
The solution is to display product attributes in a structured, filterable format directly within the product catalog.
This is where the WooBeWoo Product Table plugin comes in. It allows you to present products in a clean, organized table, making attributes easy to scan, compare, and filter.
What You Need Before Getting Started
Before creating and displaying product attributes, make sure you have:
-
WooCommerce installed and activated
-
A set of WooCommerce products already created
Once these are in place, you’re ready to start.
How to Create New Product Attributes in WooCommerce
To add new product attributes, follow these steps:
-
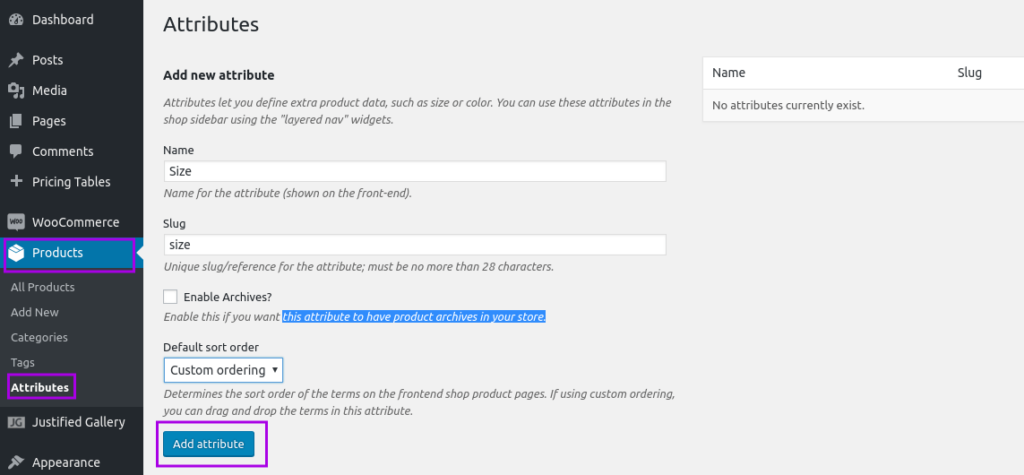
Go to Products → Attributes
-
Add a new attribute by filling in:
-
Name – The attribute label (e.g., Color, Size)
-
Slug – A unique identifier
-
Enable archives – Enable if you want archive pages for this attribute
-
Default sort order – Choose how values are ordered
-
-
Click Add attribute
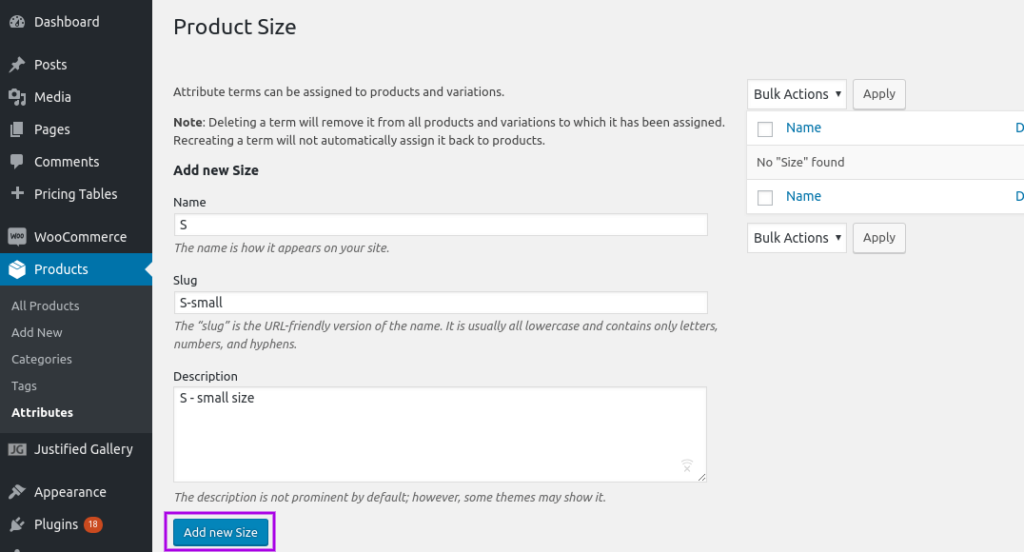
How to Configure Attribute Terms
After creating the attribute, you’ll need to add its values (terms):
-
Locate your newly created attribute
-
Click Configure terms
-
Fill in:
-
Name – What appears on the site
-
Slug – A unique code
-
Description – Optional additional details
-
-
Click Add new
This allows you to define all possible options for each attribute.
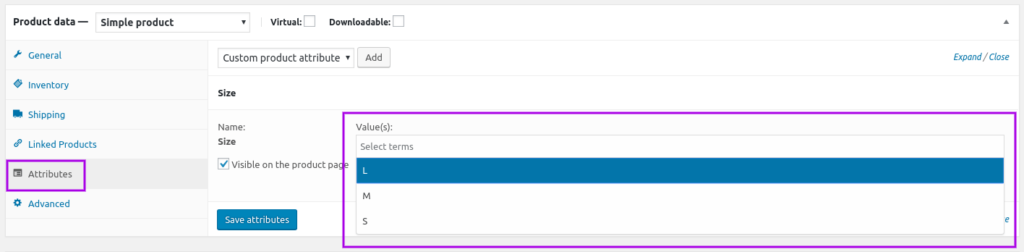
How to Assign Attributes to Products
To attach attributes to a specific product:
-
Go to Products
-
Edit the product you want
-
Scroll to the Product data section
-
Open the Attributes tab
-
Select your attribute and assign the relevant values
(You can choose more than one option)
Now the attribute is part of the product data.
How to Display Product Attributes in a Product Table
The last step is actually adding just created attributes to your Product Table. For this, we will use WooBeWoo Product Table plugin.
To add attributes to your Product Table:
-
Go to Content → Set Table Properties
-
Select the attributes you want to display as table columns
-
Click Add
Once added, your product attributes will appear directly in the table, making comparison fast and effortless for customers.
Conclusion
Displaying product attributes on WooCommerce shop pages can dramatically improve product comparison, user experience, and buying confidence. Instead of forcing customers to open multiple product pages, you give them all the information they need, right where they need it.
By combining WooCommerce with the WooBeWoo Product Table plugin, you can turn a standard product list into a powerful decision-making tool that helps customers choose faster and buy smarter.